VPYTHON程式的基本學習
1. 基本物件與運動
- sphere and box
- sphere: pos; radius; color
- box: pos; size; axis; color
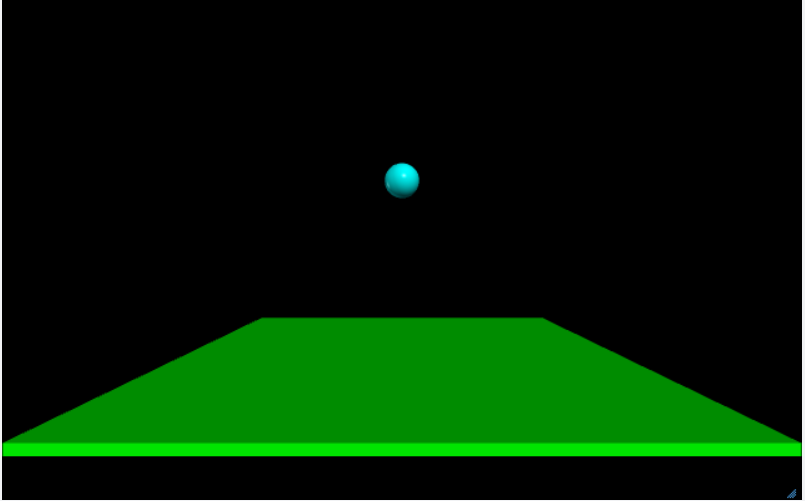
Web VPython 3.2
scene.center=vec(0,0,0)  #螢幕中央店的位置
ball=sphere(pos=vector(-5,0,0), radius=0.5, color=color.cyan)
wallR=box(pos=vector(6,0,0), size=vector(0.2,12,12), color=color.green)
VPY01.py
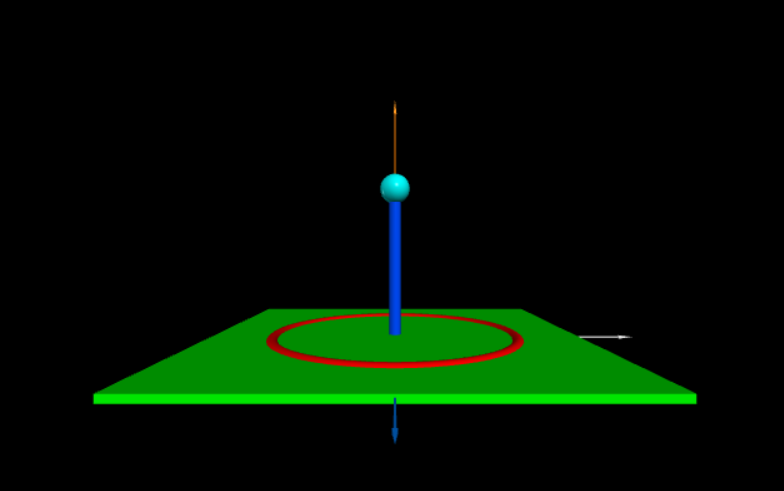
我們可以再增加一個放在平面上的圓環(ring),整個系統的三個坐標軸(arrow),從平面到球之間放置一個圓柱體(cylinder)。
上傳檔名:PSL01-A.py
|
|
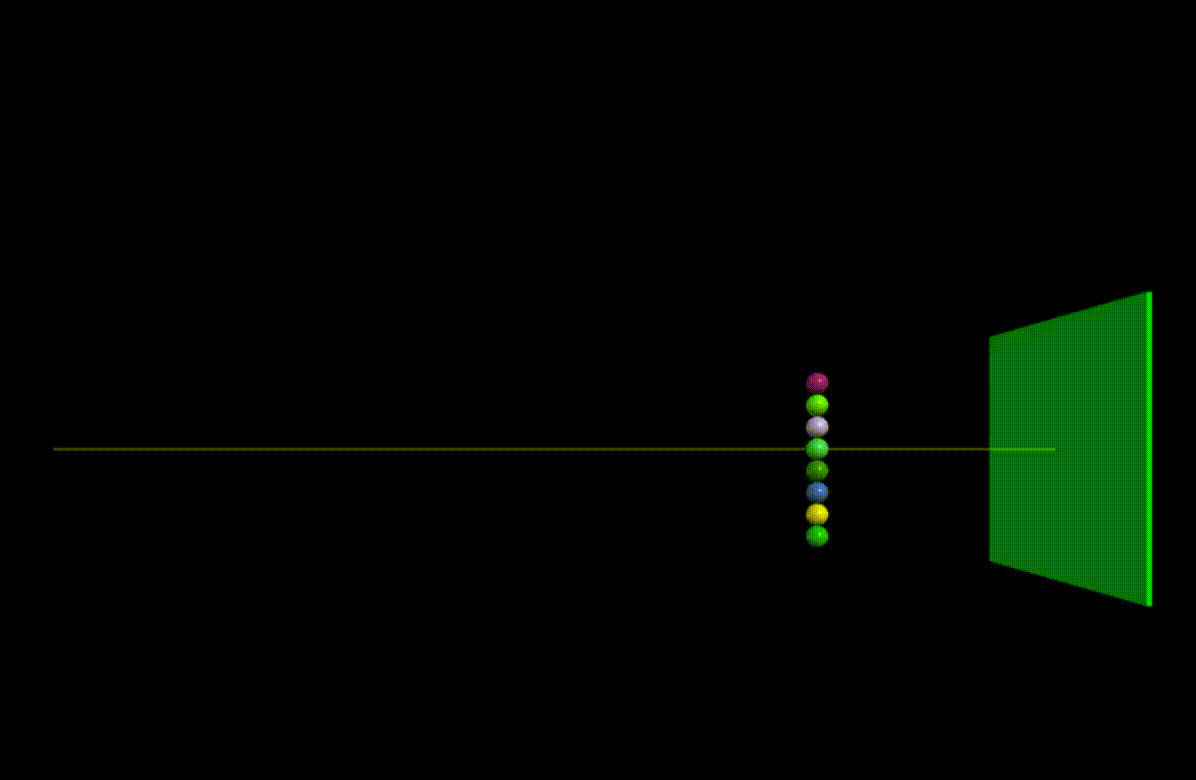
距離與尺度的關係(youtube)
Web VPython 3.2
scene=canvas(width=1200, height=200, center=vec(0,0,0), background=vec(1,1,1))
scene.camera.pos=vec(0,0,0)
arrs=[arrow(pos=vector(i*0.02,-1,-0.2), axis=vec(0,2,0), shaftwidth=0.002, headwidth=0.004, \
     color=vec(0,0,0)) for i in range(11)]
scene.pause('1')
print(scene.camera.pos)
ball=sphere(pos=vector(0,0,-160), radius=1, color=vec(0,0.5,1))
for i in range(1,7):
    ball.pos=vec(0,0,-2**(6-i))
    if(i==6): ball.pos=vec(0,0,-1.5)
    print(scene.camera.pos,ball.pos)
    scene.pause('pause')
RUN this program in glowscript
讓物件動起來
GlowScript 3.0 VPython ball = sphere(pos=vector(-5,0,0), radius=0.5, color=color.cyan) wallR = box(pos=vector(6,0,0), size=vector(0.2,12,12), color=color.green)VPY02.pyv=10; t=0; dt=0.1; while t < 2: rate(10) ball.pos.x+=v*dt t+=dt
GlowScript 3.0 VPython
ball = sphere(pos=vector(-5,0,0), radius=0.5, color=color.cyan)
wallR = box(pos=vector(6,0,0), size=vector(0.2,12,12), color=color.green)
v=10; t=0; dt=0.1;
while t < 2:
    rate(10)
    ball.pos.x+=v*dt
    if ball.pos.x > wallR.pos.x:
        v=-v
    t+=dt
VPY03.py
小練習:
8個球的運動(youtube)
上傳檔名:PSL01-B.py
code for you to try:
Web VPython 3.2
balls = [sphere(pos=vector(-5,-4+i,0), radius=0.5, color=color.cyan) for i in range(8)]
wallR = box(pos=vector(6,0,0), size=vector(0.2,12,12), color=color.green)
v=[10 for i in range(8)];
t=0; dt=0.1;
while t < 2:
    rate(10)
    for i in range(8):
        balls[i].pos.x+=v[i]*dt
        if(balls[i].pos.x > wallR.pos.x):
            v[i]=-v[i]
    t+=dt
2. 更多物件與運動控制
GlowScript 3.0 VPython ball = sphere(pos=vector(-6,0,0), radius=0.5, color=color.cyan) wallR = box(pos=vector(6,0,0), size=vector(0.2,12,12), color=color.green) v=10; t=0; dt=0.1; ball.v=vec(v*0.2,0,0)VPY04.pyvarr = arrow(pos=ball.pos, axis=ball.v, color=color.yellow) scene.waitfor('click') while t < 1.8: rate(10) ball.pos.x+=v*dt varr.pos=ball.pos t+=dt
GlowScript 3.0 VPython ball_1=sphere(pos=vector(-20,0,0), radius=0.5, color=color.cyan,VPY05.py (運動軌跡)make_trail=True ) ball_2=sphere(pos=vector(0,-20,0), radius=0.5, color=color.green,make_trail=True ) scene.autoscale = False v=10; t=0; dt=0.1; while t < 2: rate(10) ball_1.pos.x+=v*dt ball_2.pos.x+=v*dt ball_2.pos.y+=v*dt t+=dt
Web VPython 3.2
balls=[sphere(pos=vector(i,0,0), radius=0.5, color=color.cyan) for i in range(10)]
scene.center=vec(5,0,0)   #視窗的中央點座標
t=0
while t < 10:
    rate(2)
    balls[t].visible=False  #隱藏物件
    t+=1
sleep(1)

for i in range(10):
    balls[i].visible=True
sleep(0.5)
for i in range(10):
    balls[i].visible=False
sleep(0.5)

t=0
while t < 10:
    rate(2)
    balls[9-t].visible=True  #物件可見
    t+=1
VPY06.py (隱藏/可見一個物件)
小練習: 10個球+10個箭頭的運動(youtube)
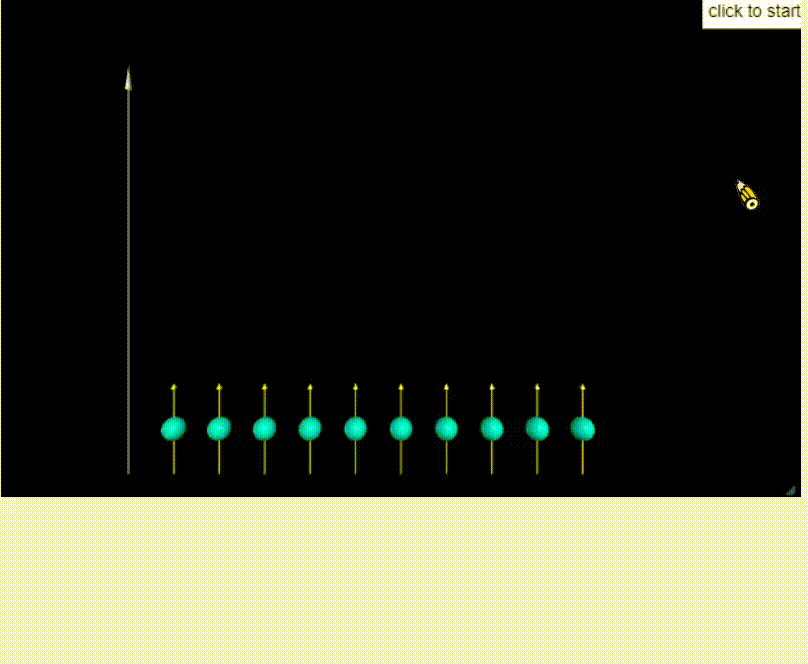
code for you to try:
Web VPython 3.2
balls=[sphere(pos=vector(i*2,0,0), radius=0.5, color=color.cyan) for i in range(10)]
arrs=[arrow(pos=vector(i*2,-2,0), axis=vec(0,4,0), shaftwidth=0.05, headwidth=0.2, color=color.yellow) for i in range(10)]
Y=arrow(pos=vector(-2,-2,0), axis=vec(0,18,0), shaftwidth=0.05, headwidth=0.2, color=color.white)
scene.center=vec(10,8,0)   #視窗的中央點座標
scene.pause("click to start")
t=0; dt=0.1; vy=1
while t < 20:
    print('t1=',t)
    rate(30)
    for i in range(10):
        arrs[i].pos.y += vy*dt
        if(arrs[i].pos.y > 10): arrs[i].visible=False
    t+=dt

t=0; dt=0.1; vy=1
while t < 20:
    print('t1=',t)
    rate(30)
    for i in range(10):
        balls[i].color=color.yellow
        balls[i].radius = 0.5+0.3*cos(t)
    t+=dt
3. 運動控制 pause
所有運動結束之後,請按著滑鼠的右鍵,帶著轉動整個畫面可以看到三維的軌跡。
Web VPython 3.2
scene.center=vec(3,3,0)
box1=box(pos=vec(0,0,0),size=vec(12,12,12),color=color.green,opacity=0.3)
ball = sphere(pos=vector(0,0,-20), radius=0.5, color=color.cyan, make_trail=True)
scene.pause('step 1\nclick:move in +x')
for i in range(20):
    rate(10)
    ball.pos.x+=0.2
scene.pause('step 2\nclick:move in +y')
for i in range(20):
    rate(10)
    ball.pos.y+=0.2
scene.pause('step 3\nclick:move in +z')
for i in range(20):
    rate(10)
    ball.pos.z+=2
4. 數學函數
abs(x)
sqrt(x)
sin(x)
cos(x)
tan(x)
asin(x)    # arc sine
acos(x)    # arc cosine
atan(x)    # arc tangent; -pi/2 to pi/2
atan2(y,x) # angle whose tangent is y/x; -pi to pi
sqrt(x)    # square root
exp(x)     # e to the x
log(x)     # natural log, base e
# log(x)/log(10) gives log base 10
pow(x,y)   # x to the power y
pi         # 3.14159....
ceil(x)    # round up to nearest integer
floor(x)   # round down to nearest integer
sign(x)    # +1 if x > 0, -1 if x < 0, 0 if x == 0
round(x)   # round to nearest integer
max(x,y,z) # the largest of x,y,z
min(x,y,z) # the smallest of x,y,z
random()   # pseudorandom number 0 to 1
factorial(x)  # x! = x*(x-1)*(x-2)....(1)
combin(x,y)   # x!/(y!*(x-y)!)
max(a,b,c,..) # maximum of these
min(a,b,c,..) # minimum of these
5. 向量函數
Vector functions mag(A) = |A|, 向量的長度,the magnitude of a vectormag2(A) = |A|*|A|, 向量長度的平方the vector's magnitude squarednorm(A) = A/|A|, 單位向量,a unit vector in the direction of the vectordot(A,B) = A dot B, 向量的內積,the scalar dot product between two vectorscross(A,B) , 向量的外積,the vector cross product between two vectorsdiff_angle(A,B) , 兩向量之間的角度,the angle between two vectors, in radiansproj(A,B) = A.proj(B) = dot(A,norm(B))*norm(B) , the vector projection of A along Bvector.random() produces a vector each of whose components is a random number in the range -1 to +1 向量的旋轉 There is a function for rotating a vector:v2 = rotate(v1, angle=a, axis=vector(x,y,z)) v2 = v1.rotate(angle=a, axis=vector(x,y,z)) There are functions for converting between degrees and radians角度轉換為弧度:radians(360) 弧度轉角度:degrees(pi)
GlowScript 3.0 VPython
A=vector.random()
B=vector.random()
print('A=',A,'  B=',B)
print('|A|,A^2=',mag(A),mag2(A))
print('norm(A)=',norm(A))
print('hat(A)=',hat(A))
print('A.B=',dot(A,B))
print('AxB=',cross(A,B))
dth=diff_angle(A,B)
print('dth=',dth,degrees(dth))
C=proj(A,B)
D=comp(A,B)
A.equals(B)
cross(A,B)
v1=vec(1,1,1)
v2 = rotate(v1, angle=radians(90), axis=vector(0,0,-1))
print(v1,v2)
O=vec(0,0,0)
X=arrow(pos=O, axis=vec(2,0,0),color=vec(1,0,1), shaftwidth=0.02)
Y=arrow(pos=O, axis=vec(0,2,0),color=vec(1,1,1), shaftwidth=0.02)
Z=arrow(pos=O, axis=vec(0,0,2),color=vec(1,0,1), shaftwidth=0.02)
arrow(pos=O, axis=v1,color=vec(1,1,0), shaftwidth=0.04)
N=20
for i in range(N):
    dth=2*pi/N*i
    v2 = rotate(v1, angle=dth, axis=vector(0,1,0))
    arrow(pos=O, axis=v2, color=vec(0,0.5,1), shaftwidth=0.02)
arrow(pos=O, axis=proj(v1,Y.axis), color=vec(1,1,0), shaftwidth=0.04)
轉動相機的位置和拍照的角度
我們以螢幕的中心點為圓心,相機在給定的半徑下圍繞螢幕中心點轉動,相機位置改變的角度也同時是相機向前方向要調整的角度,這樣才能夠正確的環繞物件作360度的轉動觀察。- scene.forward
- scene.camera.pos
Web VPython 3.2
def rdpr(x):
    s=''
    for i in range(len(x)): s+=f"{x[i]:10.2f} "
    return s
NL=4; L=4; L2=int(L/2); r=[];balls=[]; R1=0.1; R2=0.1; yc=L/2; D=3*L; ycc=3
cen=vec(0,yc,0)
scene=canvas(width=600, height=400, center=vec(0,2,0))
plane1=box(pos=cen,size=vec(L,0.1,L),color=vec(0,1,1))
cube=box(pos=vec(0,0,0),size=vec(L,L,L),color=vec(1,1,1),opacity=0.2)
cenp=sphere(pos=scene.center,radius=0.1,color=vec(1,1,1))
box(pos=vec(-2,0,0), color=color.red)
box(pos=vec(2,0,0), color=color.green)
cylinder(pos=vec(0,-0.5,0), radius=1, axis=vec(0,1,0), color=color.orange)
s = sphere(pos=vec(-2,0.8,0), radius=0.3, color=color.cyan)
scene.camera.pos=vec(D*sin(0),ycc,D*cos(0))
scene.forward=vec(sin(pi),0,cos(pi))
print(scene.forward,scene.camera.pos)
scene.pause('click')
#----rotate the camera around the charge and field-----------
th=pi;nrot=100; dth=2.0*pi/nrot
scene.camera.pos=vec(D*sin(th-pi),ycc,D*cos(th-pi))
for i in range(nrot*1+1):
    rate(5)
    th=pi+dth*i
    scene.forward=vec(sin(th),0,cos(th))
    scene.camera.pos=vec(D*sin(th-pi),ycc,D*cos(th-pi))
    x=[scene.camera.pos.x,scene.camera.pos.y,scene.camera.pos.z]
    s1=rdpr(x)
    x=[scene.forward.x,scene.forward.y,scene.forward.z]
    s2=rdpr(x)
    print(i,rdpr([th]),s1,s2)
Christmas
想製作一個動畫送給你的朋友嗎?你可以參考下面這個程式,如果很想弄懂的話可以跟老師聯絡。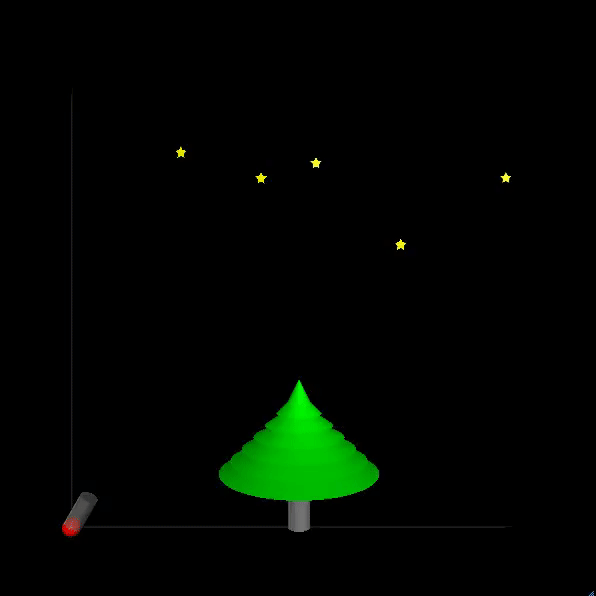
Christmas-Tree-YCC